Posts tagged ‘Getting Started’

JAOM: Joe’s Ancient Orange Mead

This recipe is shared and talked about all over the mead making internet. It’s fondly referred to as JAOM.


Three things attracted me to trying it out:


• Everyone who has made it seems to love it.
• It’s dead simple to make with household ingredients.
• It’s ready to drink in two months. (Most meads need at least 6 months to finish.)


If you’re starting out making mead this recipe seems to be the one to start with.


I followed the recipe below which I found and copied from the GotMead website here.


FYI: I didn’t use any nutmeg; feh! (I’m surprised I used the clove!)


Hydrometer reading approx. 1.128; hard to be certain with all the foam in the jug.
44957179-1 JAOM ingredients

Ingredients

3 1/2 lbs Clover or your choice honey or blend (will finish sweet)
1 Large orange (later cut in eights or smaller rind and all)
1 small handful of raisins (25 if you count but more or less ok)
1 stick of cinnamon
1 whole clove (or 2 if you like – these are potent critters)
optional (a pinch of nutmeg and allspice)(very small)
1 teaspoon of Fleishmanns bread yeast (now don’t get holy on me— after all this is an ancient mead and that’s all we had back then)
Balance water to one gallon

Methods/steps

This is one I have shared before but it may have got lost in the rebuild. It is so simple to make and you can make it without much equipment and with a multitude of variations. This could be a first Mead for the novice as it is almost fool proof. It is a bit unorthodox but it has never failed me or the friends I have shared it with.

Process:

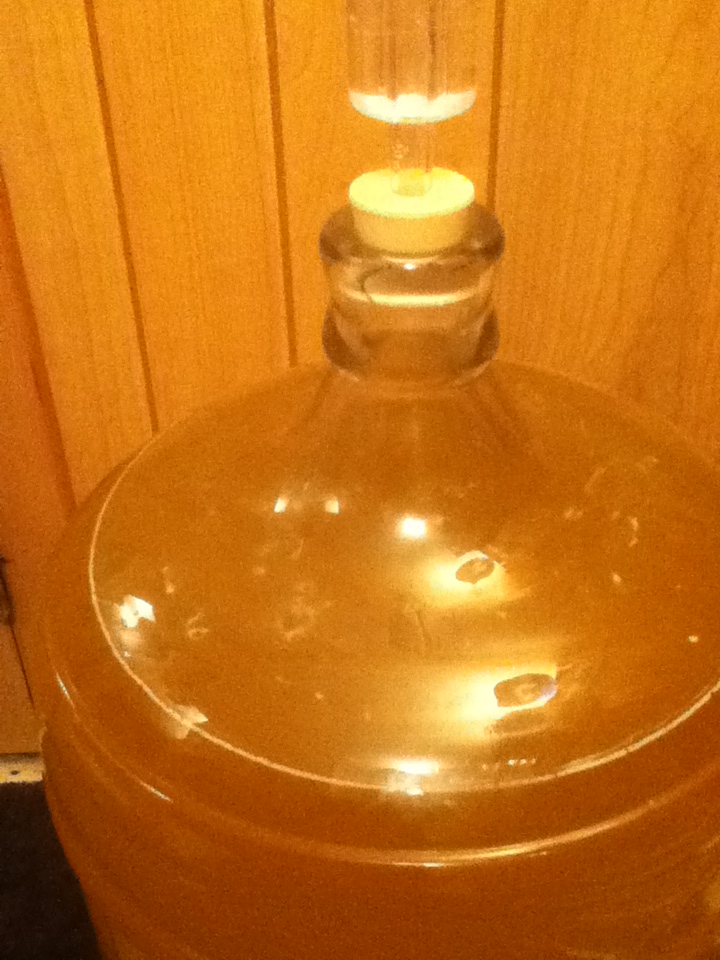
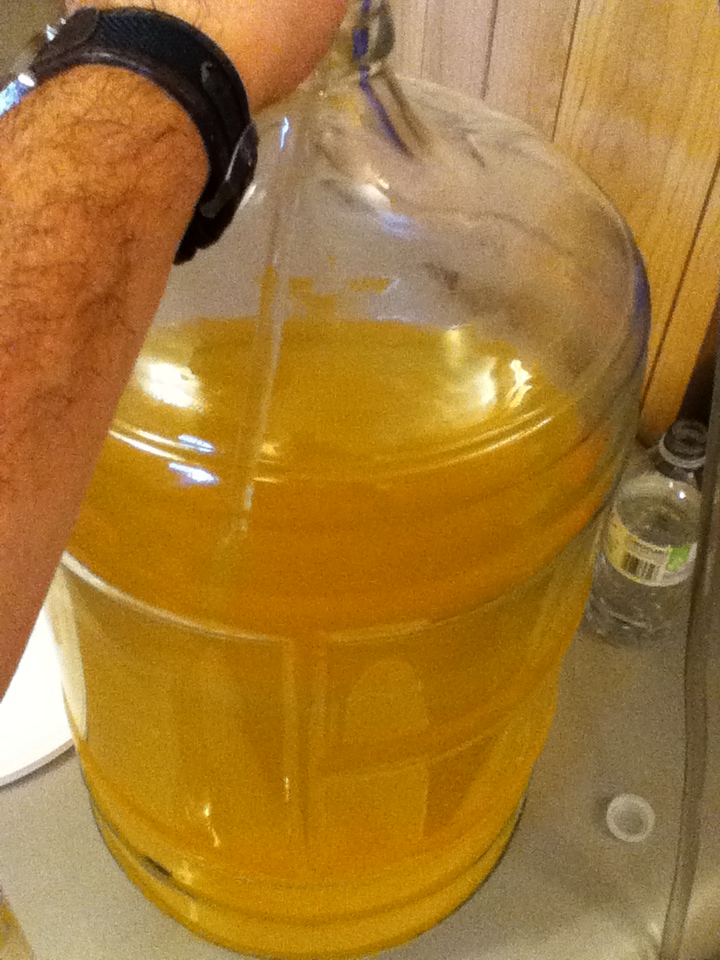
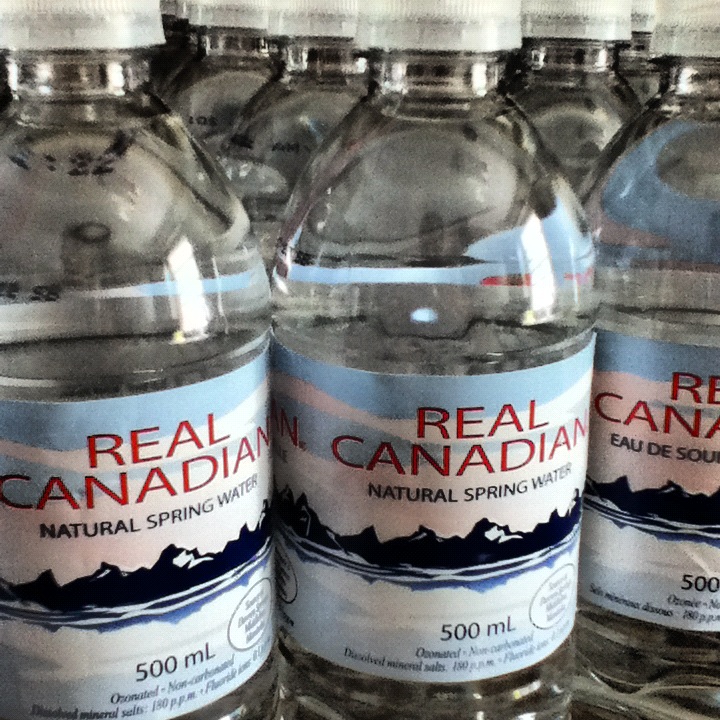
Use a clean 1 gallon carboy

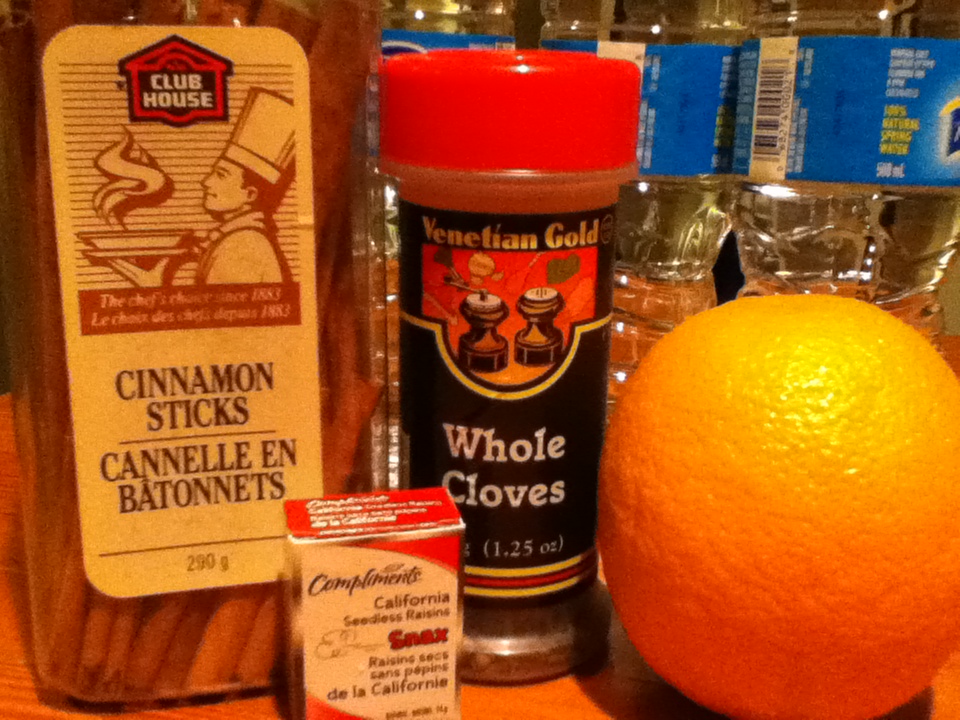
Dissolve honey in some warm water and put in carboy

Wash orange well to remove any pesticides and slice in eights –add orange (you can push em through opening big boy — rinds included — its ok for this mead — take my word for it — ignore the experts)

Put in raisins, clove, cinnamon stick, any optional ingredients and fill to 3 inches from the top with cold water (need room for some foam — you can top off with more water after the first few day frenzy)

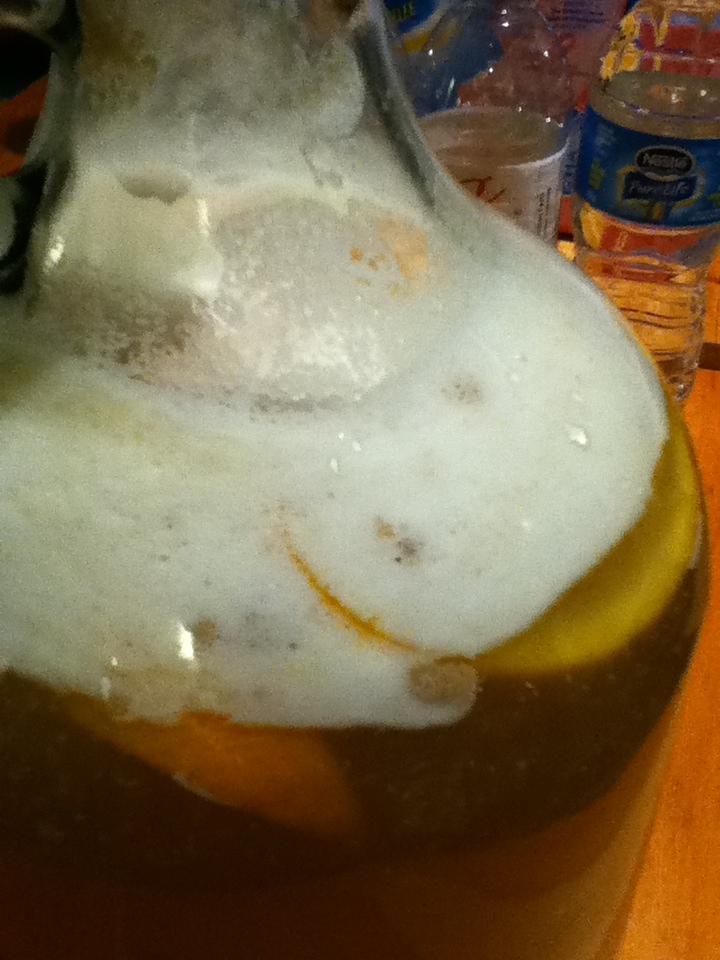
Shake the heck out of the jug with top on, of course. This is your sophisticated aeration process.

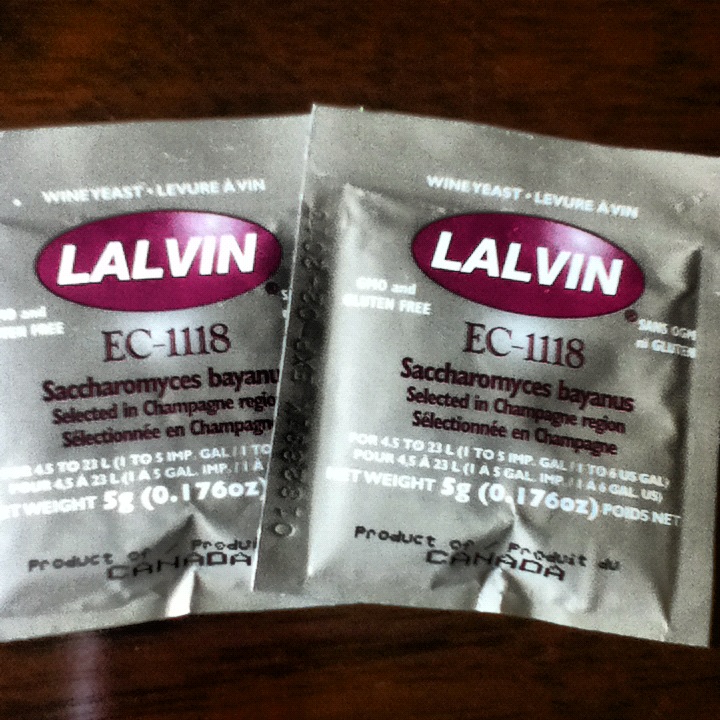
When at room temperature in your kitchen. Put in 1 teaspoon of bread yeast. (No you don’t have to rehydrate it first– the ancients didn’t even have that word in their vocabulary– just put it in and give it a gentle swirl or not)(The yeast can fight for their own territory)

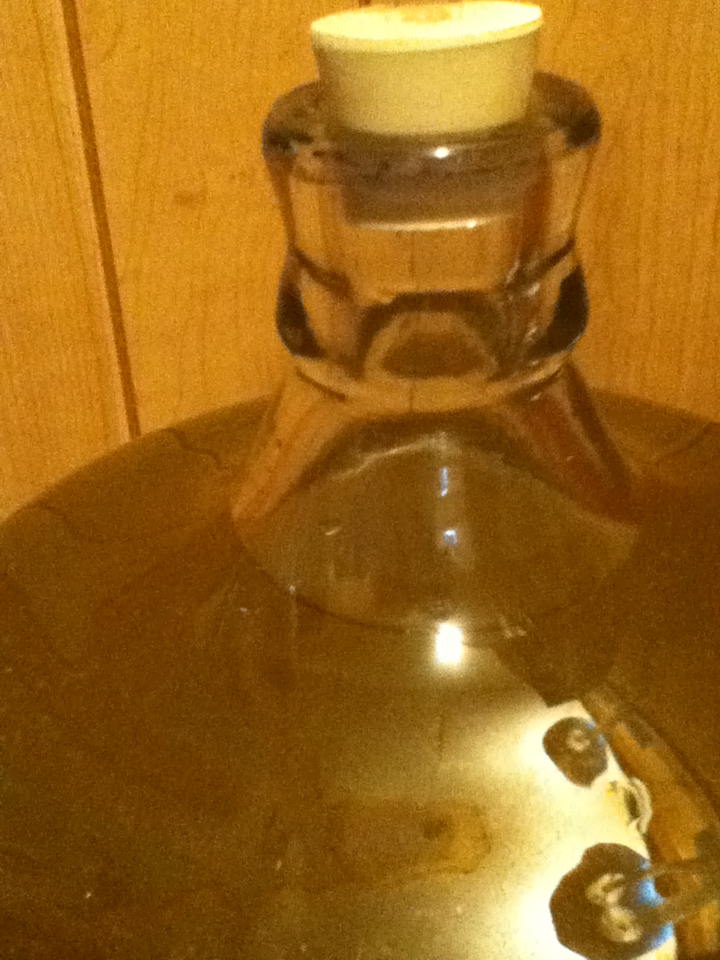
Install water airlock. Put in dark place. It will start working immediately or in an hour. (Don’t use grandma’s bread yeast she bought years before she passed away in the 90’s)(Wait 3 hours before you panic or call me) After major foaming stops in a few days add some water and then keep your hands off of it. (Don’t shake it! Don’t mess with them yeastees! Let them alone except its okay to open your cabinet to smell every once in a while.

44957181-2 JAOM

Racking — Don’t you dare
additional feeding — NO NO
More stirring or shaking — Your not listening, don’t touch

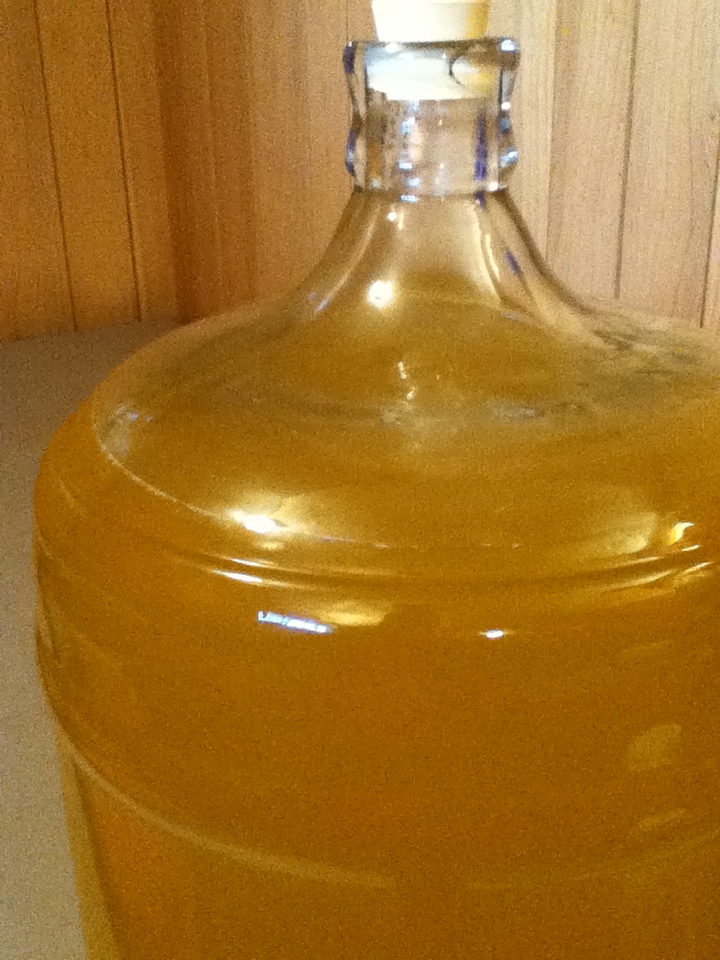
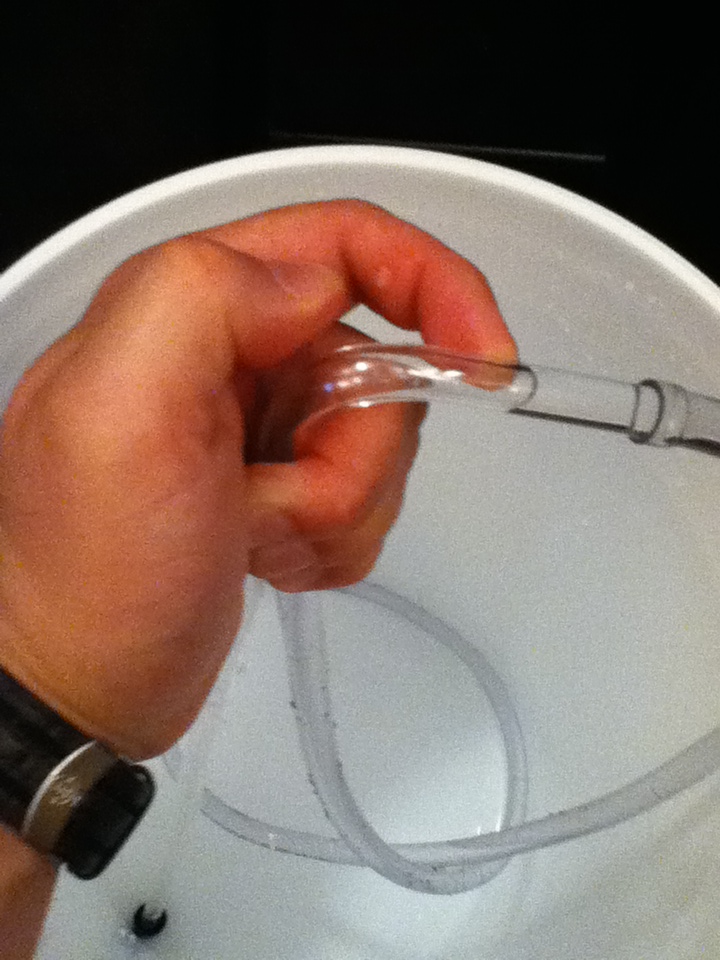
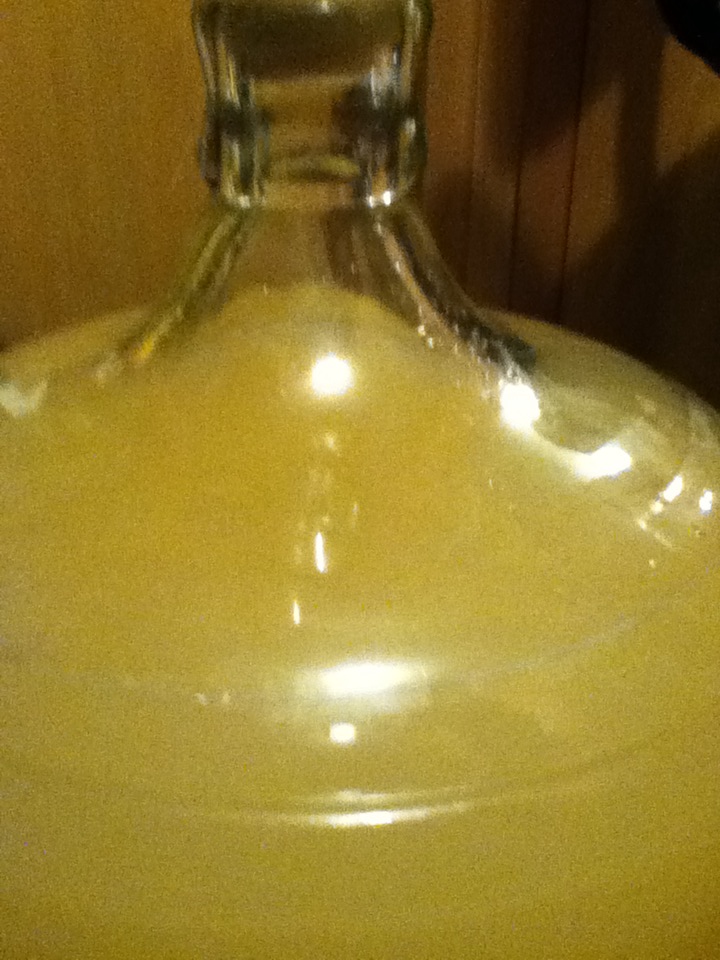
After 2 months and maybe a few days it will slow down to a stop and clear all by itself. (How about that) (You are not so important after all) Then you can put a hose in with a small cloth filter on the end into the clear part and siphon off the golden nectar. If you wait long enough even the oranges will sink to the bottom but I never waited that long. If it is clear it is ready. You don’t need a cold basement. It does better in a kitchen in the dark. (like in a cabinet) likes a little heat (70-80).
If it didn’t work out… you screwed up and didn’t read my instructions (or used grandma’s bread yeast she bought years before she passed away). If it didn’t work out then take up another hobby. Mead is not for you. It is too complicated.
If you were successful, which I am 99% certain you will be, then enjoy your mead. When you get ready to make a different mead you will probably have to unlearn some of these practices I have taught you, but hey— This recipe and procedure works with these ingredients so don’t knock it. It was your first mead. It was my tenth. Sometimes, even the experts can forget all they know and make a good ancient mead.

Enjoy, Joe
— submitted by Joe Mattioli

Baggins Brew, 2nd Racking

It’s been just over a month since I first made this, my first batch of mead. You can see in the pictures there was some accumulation of sediment and there was a little “white stuff” sitting on top of the mead in the Carboy.

44447352-01 Before Racking

44447353-02 Lees before racking

44447354-03 Lifted on table no white stuff

44447355-04 Priming the syphon tube

44447356-05 Racking in progress

44447357-06 Racking out of brewing bucket

44447358-07 Hydrometer reading 1.040

44447359-08 Avoiding the lees

44447360-09 Topped up with 2L of water

After I moved the Carboy to a table top to get it ready for syphoning the white stuff cleared right up. It turned out to be just some incompletely popped carbon dioxide bubbles.


Since I only have one Carboy I racked it into my white brewing bucket then back again into the Carboy. I was concerned that I might get oxygen into my mead doing this. (I’ve read many warnings online to avoid oxygenating the mead when racking because it could ruin the taste.) I tried to minimize this by priming the racking tubing, as you can see in one of the pictures, by filling it up with spring water just before I started syphoning. This made it a virtually splash-free process and I didn’t have to start the syphoning by sucking on the tube which might introduce bacteria from my mouth into the mead. See the video below:
I topped it up with about 2L of spring water to minimize the surface area of the mead exposed to air in the Carboy. Also, since the fermenting has slowed down significantly, less carbon dioxide is needed to push out any air that got into the Carboy during racking. You can see the result in the last picture in the gallery above.


It’s still slightly carbonated. The taste is improving but it’s not there yet. There’s something of a bite to the finish that I think will clear up over the next few months. I’ll rack it again in about a month.


Also, I took a hydrometer reading: 1.040. After topping up with 2L of water the hydrometer read 1.036.

After Racking

43891641-In the secondary

I syphoned the must out of the primary and into the secondary fermenter, the Carboy. You can see it in the picture below.


One day after racking it was bubbling at a rate of 1 bubble every 5 seconds. Today, 3 days after racking, it’s bubbling at a rate of 1 bubble every 6 seconds.


It’ll be another 3.5 weeks before we rack it again. Until then, we wait.

First Racking and Taste Test

There was a lot of excitement in the house tonight as my two littlest girls (6 y.o. and 4 y.o.) helped me syphon the mead out of the primary and into a glass Carboy. You’ll hear all about it in the videos below. 😉

Yesterday, day 6 of fermentation, we were getting about 1 bubble every 21 seconds. Today, I didn’t see any bubbles after watching the airlock for more than 5 minutes. I figured it was time to “rack” (syphon it from one container to another) the mead.

• The “lees” left behind in the Primary.
• The Carboy after it was topped off with about 4 litres of fresh spring water.
• Sadie watches for bubbles in the airlock on the Carboy.
43825454-The %22lees%22 left in the primary
43825455-Carboy topped off with about 4 L of spring water
43825456-Sadie Watching for bubbles in Carboy
Once it was “racked” into the Carboy and sealed with the airlock it was bubbling at about 1 bubble every 30 seconds.
We took a hydrometer reading: 1.055. (I read this incorrectly in the video.)

We also had a little taste test. I hope it tastes better as it ages. 😉

Video Series: How To Make Mead

If you ever want to make your own mead I found this video series below by Will Kalif an indispensable resource. Will has lots more to help a new mead maker on his site at http://www.stormthecastle.com/mead/index.htm

Mind you, I didn't follow Will's guidelines 100%. Talking to the proprietors of a few local home brew shops was equally indispensable.

Part 1 – The Ingredients Needed

Part 2 – Adding the Water

Part 3 – Adding Honey

Part 4 – Pitching Yeast

Part 5 – Pitching the Yeast & Agitating

Part 6 – Finishing

After the first 24 hours

Here’s what’s happening 24 hours into making my first brew and how I’m doing at resisting temptation. 😉

The Baggins Brew Must

Giddy-up! Time to make Mead!


Add about 12 litres or 3 gallons of water into the primary bucket.


Pour in the honey. First let it sit in it’s container for a few minutes inside a pan of warm, not hot, water if you like; that will help it pour more easily.


Mix 30ml or 2 tablespoons of yeast nutrient with water in a glass or small bowl. Let it sit.


Cover your 2 packages of yeast in a glass or small bowl with some warm water, about 40°C. Don’t mix it. Let it sit 15 minutes before you pitch it into the must.


I also heated up some spring water, warm not hot, and used it to cover and rinse the honey containers. I poured every bit of honey I could into my primary.


Toss in the the yeast nutrient and mix everything well.


Now’s the time to take your hydrometer reading. You can skip this if you like. The hydrometer (which came with my starter kit) measure the sugar to water content of the must. More suger means a more potent final brew. My hydrometer reading was about 1.120 which appears to be the right concentration for a dessert wine and I expect a final brew with about 16%-17% alcohol content. Actually it may be closer to 14%-15%. I left a good 10-15 cm (4-6 inches) off the top of my primary. I was warned that the yeast I’m using is very potent and I may get a lot of bubbles and gas early on. That can blow the top off the primary and make a horrible mess. I can add the missing water in a week or two when I move the must from the primary to it’s secondary fermenting container, a glass carboy.


Now pitch in the yeast.


Stir vigorously for a minimum of 5 minutes. Your yeasty beasties need lots of oxygen to chew all that sugar into alcohol.


Must is done! Cover the primary with the lid, plug the hole in the top with your airlock and wait … it’ll be at least a week; maybe two.


In a few hours you should start to notice bubbles in the airlock.
43684292-1 water 43684293-2 Pour honey 43684294-3 Yeast Nutrient 43684295-4 Hydrometer reading 43684296-5 Activated Yeast 43684297-6 Stiring for 5 min 43684298-7 Must Complete 43684299-8 Primary Sealed

Sanitizing

Sanitized

Everyone I talked to emphasized over and over again how important it is to ensure that everything that touches the “must” (that’s what you call the initial mixture of water, honey and yeast) is sanitized. You can buy various cleaning products at a local home brew shop to do this and my Wine Starter Kit included a package of sodium metabisulphite to make a cleaning solution. A little research revealed that plain bleach does the job just as well.


Cleaning Recipe
15 ml (1 tablespoon) of unscented bleach
1 gallon of tap water


Put everything into the white primary bucket that will fit. Add in the bleach & water solution. Close it and shake well so the solution touches every surface. It just needs to touch everything, you don’t need to go crazy with this. Remove the top of the bucket and use the top to lay out all your freshly sanitized equipment. Whatever doesn’t fit in the bucket add in there now, as far as it will fit, and use your hands (wear gloves) to cover everything, inside and out with the cleaning solution. Now rinse. I’m fanatic about this. I rinsed three times. Let it all air dry.


What I like best about using bleach is that it’s biodegradable; it degrades into water and (inedible) salt. Just rinse well and you’ve got it covered. And this is cheep too! Do you know how little bleach 15 ml is?

The Recipe for The Baggins Brew

It’s been almost 20 years since the first and last time I tasted mead. I loved it. I can’t seem to find it anywhere. I had originally bought it directly from an apiarist in Quebec but can’t get it anywhere in Manitoba so I’ve decided to make my own.


This is the recipe I’m using for my first brew. I want to keep it simple and stay as close to a pure mead recipe as possible. I learned a lot from The Joy of Mead pages at http://www.stormthecastle.com/mead/index.htm but the best by far has been visiting and talking with the proprietors of various home brew shops around Winnipeg. If you decide to do this yourself I’d strongly recommend talking to as many people as you can and reading as much about it as you can. There are so many ways to go about making mead. My approach is to keep it simple.


The Recipe for The Baggins Brew
4 gallons spring water (store bought)
15 lbs honey (I got it from a Hutterite farmer I met one day chatting in a local home brew shop)
2 packages of yeast (Lalvin EC-1118, a very efficient champagne yeast)
2 tablespoons yeast nutrient (both this and the yeast were purchased at a local home brew shop)


The Equipment
I bought a wine starter kit for just over $70 at a local home brew shop. The list can be seen in the picture gallery on this post.

43681950-1 Wine Starter Kit 43681952-2 Wine Starter Kit Unboxed 43681954-3 honey 43681956-4 water 43681957-5 Yeast Nutrient 43681958-6 Yeast